# Devices overview
> Learn the basics of using the Devices API to accept in-person payments
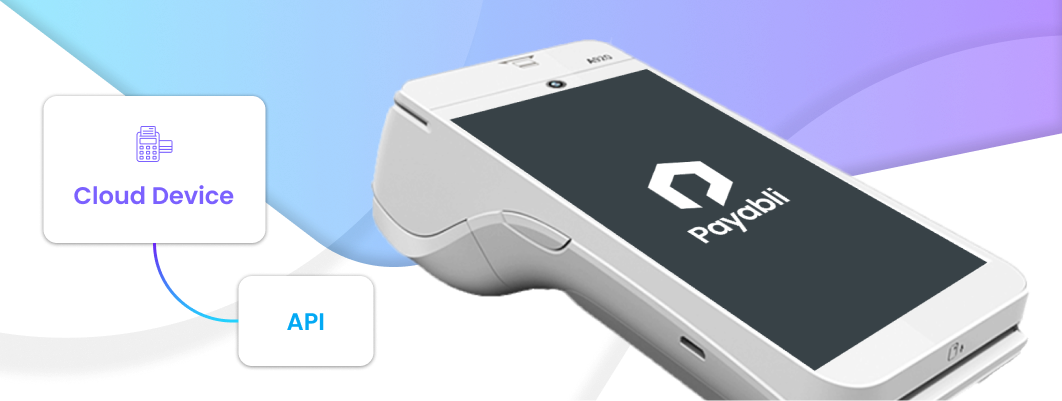
Payabli offers integrated P2PE (point-to-point encryption) cloud devices, also known as credit card terminals, that you can use to make sales via the Payabli API. Payabli has made setting up devices frictionless. First, order a device from Payabli, then register each new device with a single API call.
 ## Point-to-point encryption (P2PE)\[#p2pe]
Point-to-point encryption (P2PE) provides the most secure and effective solution to protect sensitive cardholder data in combination with EMV and tokenization. P2PE can help reduce the cost and scope of PCI DSS and PA-DSS. Encrypted cardholder data has no value if stolen, as only Payabli and secured providers can decrypt the data.
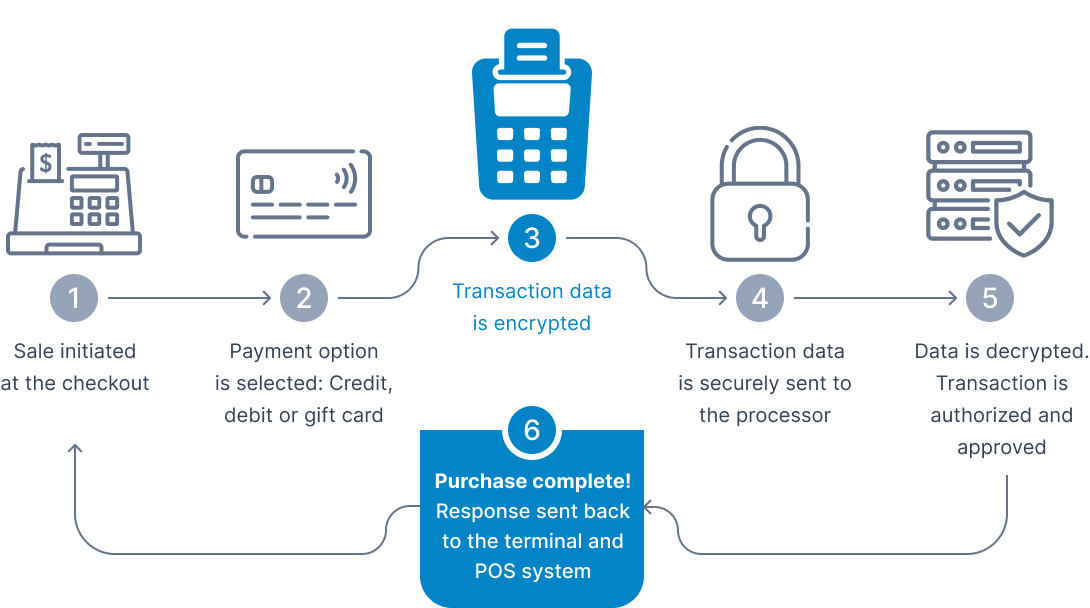
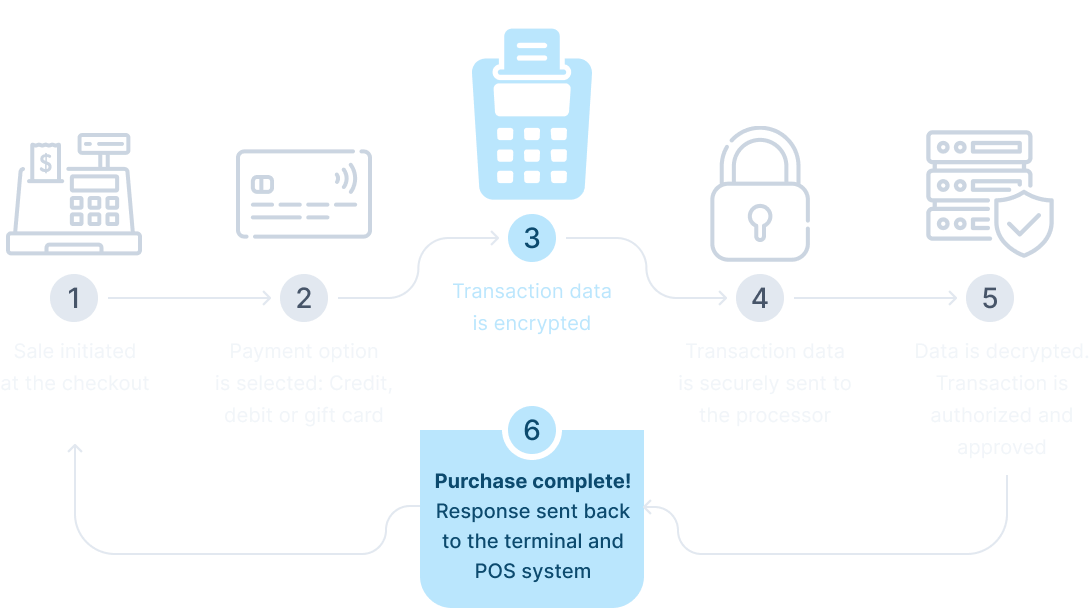
P2PE ensures that no cardholder data is exposed during a transaction by encrypting the data inside the card reader, terminal, or payment device. This encryption makes the data useless in the event of a skimming attack. Using the payment industry standard encryption algorithm, DUKPT (Derived Unique Key Per Transaction), a key is injected securely into each card reader or payment device when it's manufactured. This key is then used to encrypt every transaction. Each transaction remains encrypted until received by Payabli, where it's decrypted, then passed to the bank or processor for authorization via Payabli's secure payment gateway.
1. At the point of card acceptance, within the card reader or payment device, the card data is securely encrypted.
2. After the data is encrypted, it can then be passed over standard public networks to the payment gateway and processor.
3. When the data arrives in the secure data zone of Payabli's PCI DSS certified payment gateway, it's decrypted and passed to the bank processor for authorization.
There are numerous benefits to using P2PE devices:
* Easy integration through the use of Payabli's [Quickstart Guide](/guides/pay-in-devices-overview) and [Cloud Device API](/developers/api-reference/cloud/register-cloud-device)
* Reduce scope, complexity and compliance cost of PCI DSS
* Simplified PA-DSS for equipment manufacturers
* Mitigate the risk of cardholder data fraud
* Reduce financial liability
* Reduce software development cost
* Increased cardholder data protection
* Simplified payment processing architecture
Contact your Payabli Customer Success Manager to order credit card terminals.
This guide gives a high-level overview of device setup and making sales using a payment cloud device (also known as credit card terminals).
## Devices quickstart
These next sections cover getting started with devices, including how to register a device, make a transaction, and handle asynchronous transactions with the PAX A920 device.
### Step 1: Register a device
Each hardware device has its own detailed setup instructions, so when in doubt, consult the documentation that came with the device.
1. Turn on the device and connect to the internet.
2. After you configure WiFi, an activation code appears on the screen. This is the `registrationCode` value you need for the next step. If you can't find the activation code, consult the device's documentation.
3. Register the device using the activation code via the API [Register Hardware Device in Cloud Service](/developers/api-reference/cloud/register-cloud-device).
1. Follow the [PAX A920 Setup Guide](/guides/pay-in-developer-devices-pax-a920-setup)
2. Find the serial number on the back of the device. This is the `registrationCode` value you need for the next step.
3. Register the device using the activation code via the API [Register Hardware Device in Cloud Service](/developers/api-reference/cloud/register-cloud-device).
If the API response is successful, you get a device identifier in the **ResponseData** field. Use this device identifier to make payments or store payment methods using the device.
### Step 2: Make a transaction
Submit a payment request and include the device identifier in the field **device** inside the object **paymentMethod** and ensuring that the **method** field contains the value **cloud**.
For example, this transaction is using the device with the ID `6c361c7d-674c-44cc-b790-382b75d1xxx`.
```json
{
"paymentMethod": {
"method": "cloud",
"device": "6c361c7d-674c-44cc-b790-382b75d1xxx"
},
"paymentDetails": {
"totalAmount": 100
},
"customerData": {
"customerId": 224,
},
"entryPoint": "my-entry-point"
}
```
Ingenico devices only: You can pull signature data from a transaction made with a cloud device. Wait 10 seconds then send a request with the transaction ID to the
[MoneyIn/details](/developers/api-reference/moneyin/get-details-for-a-processed-transaction)
endpoint. The signature data is returned in the response.
## Related resources
See these related resources to help you get the most out of Payabli.
* **[Manage cloud devices](/guides/pay-in-developer-devices-manage)** - Learn how to register, unregister, and list cloud devices for making card-present sales
* **[Register cloud device](/developers/api-reference/cloud/register-cloud-device)** - Learn how to register a cloud device using the API
## Point-to-point encryption (P2PE)\[#p2pe]
Point-to-point encryption (P2PE) provides the most secure and effective solution to protect sensitive cardholder data in combination with EMV and tokenization. P2PE can help reduce the cost and scope of PCI DSS and PA-DSS. Encrypted cardholder data has no value if stolen, as only Payabli and secured providers can decrypt the data.
P2PE ensures that no cardholder data is exposed during a transaction by encrypting the data inside the card reader, terminal, or payment device. This encryption makes the data useless in the event of a skimming attack. Using the payment industry standard encryption algorithm, DUKPT (Derived Unique Key Per Transaction), a key is injected securely into each card reader or payment device when it's manufactured. This key is then used to encrypt every transaction. Each transaction remains encrypted until received by Payabli, where it's decrypted, then passed to the bank or processor for authorization via Payabli's secure payment gateway.
1. At the point of card acceptance, within the card reader or payment device, the card data is securely encrypted.
2. After the data is encrypted, it can then be passed over standard public networks to the payment gateway and processor.
3. When the data arrives in the secure data zone of Payabli's PCI DSS certified payment gateway, it's decrypted and passed to the bank processor for authorization.
There are numerous benefits to using P2PE devices:
* Easy integration through the use of Payabli's [Quickstart Guide](/guides/pay-in-devices-overview) and [Cloud Device API](/developers/api-reference/cloud/register-cloud-device)
* Reduce scope, complexity and compliance cost of PCI DSS
* Simplified PA-DSS for equipment manufacturers
* Mitigate the risk of cardholder data fraud
* Reduce financial liability
* Reduce software development cost
* Increased cardholder data protection
* Simplified payment processing architecture
Contact your Payabli Customer Success Manager to order credit card terminals.
This guide gives a high-level overview of device setup and making sales using a payment cloud device (also known as credit card terminals).
## Devices quickstart
These next sections cover getting started with devices, including how to register a device, make a transaction, and handle asynchronous transactions with the PAX A920 device.
### Step 1: Register a device
Each hardware device has its own detailed setup instructions, so when in doubt, consult the documentation that came with the device.
1. Turn on the device and connect to the internet.
2. After you configure WiFi, an activation code appears on the screen. This is the `registrationCode` value you need for the next step. If you can't find the activation code, consult the device's documentation.
3. Register the device using the activation code via the API [Register Hardware Device in Cloud Service](/developers/api-reference/cloud/register-cloud-device).
1. Follow the [PAX A920 Setup Guide](/guides/pay-in-developer-devices-pax-a920-setup)
2. Find the serial number on the back of the device. This is the `registrationCode` value you need for the next step.
3. Register the device using the activation code via the API [Register Hardware Device in Cloud Service](/developers/api-reference/cloud/register-cloud-device).
If the API response is successful, you get a device identifier in the **ResponseData** field. Use this device identifier to make payments or store payment methods using the device.
### Step 2: Make a transaction
Submit a payment request and include the device identifier in the field **device** inside the object **paymentMethod** and ensuring that the **method** field contains the value **cloud**.
For example, this transaction is using the device with the ID `6c361c7d-674c-44cc-b790-382b75d1xxx`.
```json
{
"paymentMethod": {
"method": "cloud",
"device": "6c361c7d-674c-44cc-b790-382b75d1xxx"
},
"paymentDetails": {
"totalAmount": 100
},
"customerData": {
"customerId": 224,
},
"entryPoint": "my-entry-point"
}
```
Ingenico devices only: You can pull signature data from a transaction made with a cloud device. Wait 10 seconds then send a request with the transaction ID to the
[MoneyIn/details](/developers/api-reference/moneyin/get-details-for-a-processed-transaction)
endpoint. The signature data is returned in the response.
## Related resources
See these related resources to help you get the most out of Payabli.
* **[Manage cloud devices](/guides/pay-in-developer-devices-manage)** - Learn how to register, unregister, and list cloud devices for making card-present sales
* **[Register cloud device](/developers/api-reference/cloud/register-cloud-device)** - Learn how to register a cloud device using the API