> This is Payabli documentation. For a complete page index, fetch https://docs.payabli.com/llms.txt — append .md to any page URL for lightweight markdown. For section-level indexes, query parameters, and other AI-optimized access methods, see https://docs.payabli.com/ai-agents.md
# Manage custom fields for customers
> Create and manage custom fields and identifiers for customer records
Payabli's default customer profile captures standard fields like name, address, and contact details. Custom fields let you extend that profile with data specific to your business — for example, an account tier, an internal reference number, or a contract type.
Any custom field you create can also be a custom identifier, letting you decide which customer profile fields Payabli uses to uniquely identify and associate customer records and payments.
To create, edit, or delete custom fields, you need the Admin user role. Other user roles can view, but not edit the **Custom Fields & Identifiers** page.
## Add a custom field
To add a custom field:
1. Navigate to **Settings > Custom Fields**.
2. Click **Add or Edit Custom Field**.
3. Enter the field's name.
4. Click **Save**.
If you already have custom fields, click the **+** icon to add another.
## Edit a custom field
To edit a custom field:
1. Navigate to **Settings > Custom Fields**.
2. Click the **Add or Edit Custom Field** button.
3. Select the custom field you want to rename, then enter the new name.
4. Click **Save**.
## Delete a custom field
To delete a custom field:
1. Navigate to **Settings > Custom Fields**.
2. Click the **Add or Edit Custom Field** button.
3. Click the trash icon beside the field you want to delete.
4. Click **Save**.
If you accidentally delete a field, click **Cancel** — your changes won't be saved.
## Custom identifiers
Payabli recommends using the system-generated `customerId` field to identify customers for ease of integration and consistency. However, you can configure custom identifiers, which lets you decide which customer profile fields to use to uniquely identify and associate customer records and payments.
Custom identifiers cascade from org parent to child entities, so you can set them at the organization level and have them apply to all child paypoints. This is useful if you want to use a specific field across all your customers, such as `email` or `clientId`.
For example, if your company uses the customer's email address as their unique identifier, you can choose `email` as the identifier. If your organization prefers to identify customers by a field called `clientId`, you can create that custom field in Payabli and set it as an identifier. This means that every API call that involves a customer must include the `clientId` because Payabli uses that field to search for customers.
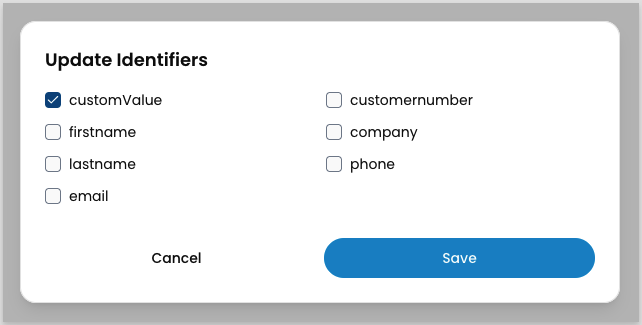
 To configure custom identifiers:
1. Navigate to **Settings > Custom Fields**.
2. Click **Edit** in the **Custom Identifiers** section.
3. Select the fields you want to use as identifiers.
4. Click **Save**.
To configure custom identifiers:
1. Navigate to **Settings > Custom Fields**.
2. Click **Edit** in the **Custom Identifiers** section.
3. Select the fields you want to use as identifiers.
4. Click **Save**.
 ## Related resources
See these related resources to help you get the most out of Payabli.
* **[Manage customers in the UI](/guides/pay-in-portal-customers-manage)** - Learn how to add and manage customers in the Payabli UI
* **[Manage Customers with the API](/guides/pay-ops-developer-customers-manage)** - Learn how to add and manage customers with the Payabli API
## Related resources
See these related resources to help you get the most out of Payabli.
* **[Manage customers in the UI](/guides/pay-in-portal-customers-manage)** - Learn how to add and manage customers in the Payabli UI
* **[Manage Customers with the API](/guides/pay-ops-developer-customers-manage)** - Learn how to add and manage customers with the Payabli API