Create an autopay
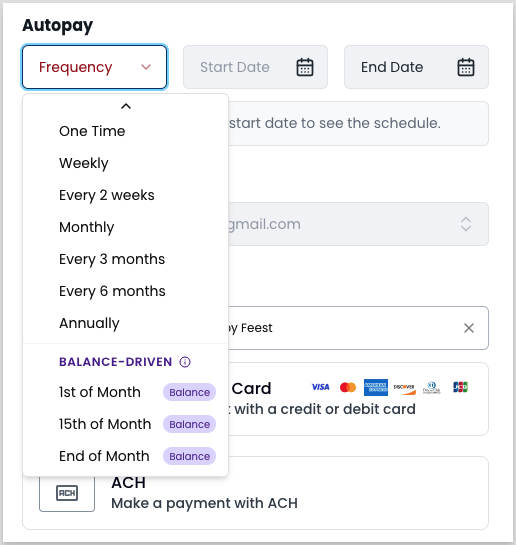
Autopays are recurring payments that charge a customer at a scheduled interval. Payabli supports two types: schedule-driven and balance-driven. A schedule-driven autopay runs on a defined interval until it reaches its end date or you cancel it. A balance-driven autopay charges the customer’s open balance at execution time on a set monthly schedule — the 1st, 15th, or last day of the month. If the balance is zero, Payabli skips the cycle.
Before enrolling customers in autopays, make sure you have clear terms and conditions that cover cancellation policies, refund rules, billing frequency, and payment amounts. Work with your legal team to draft these. Displaying terms and capturing customer consent protects you in the event of a chargeback dispute.
Create a schedule-driven autopay
To create a schedule-driven autopay, start from the customer record:
If you’re at the paypoint level, you can also create autopays from the Autopays report by clicking Create at the top of the screen.
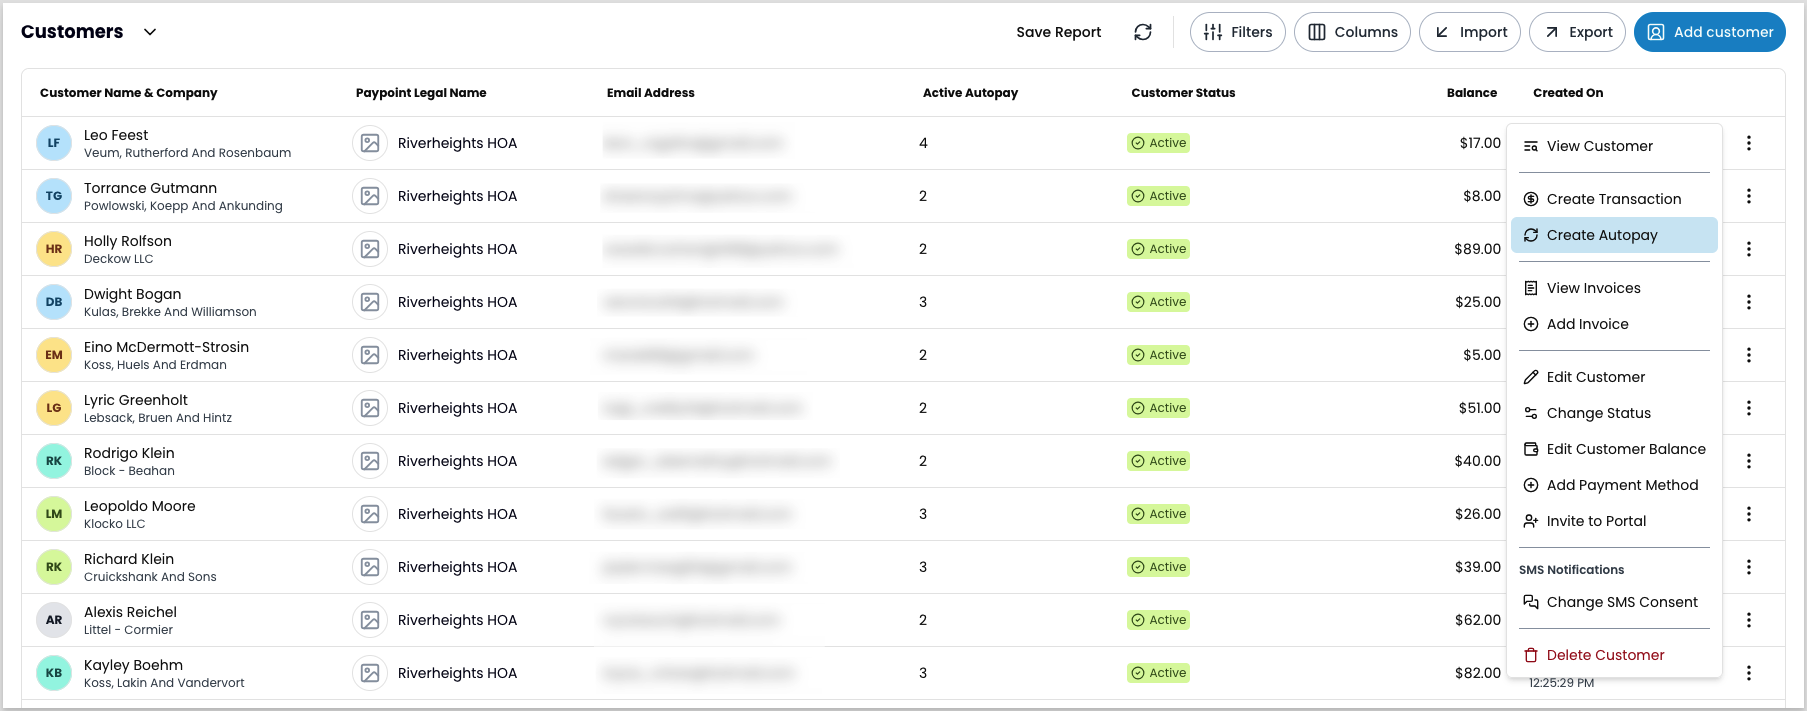
Open the customer record
Navigate to Pay In > Customers, locate the customer record, and click the three-dot icon. Select Create autopay to open the Create Autopay modal.
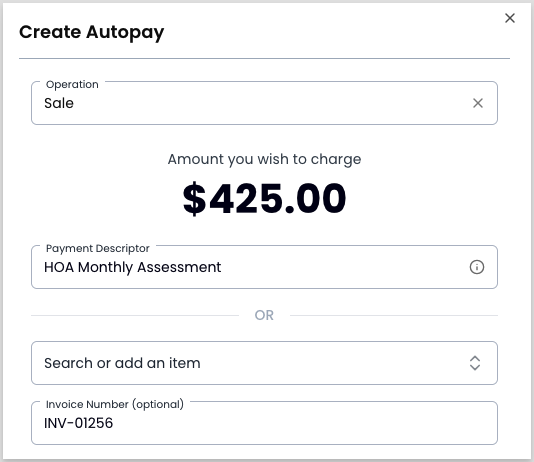
Select the operation type
Choose Sale to capture funds immediately, or Authorize to hold the funds and capture manually.
The operation type can’t be changed after the autopay is created. If you select the wrong type, cancel the autopay and create a new one.
Enter the amount, description, and invoice number
Enter the payment amount — for example, 425.00 for monthly HOA dues. Then search for a line item in your catalog, such as HOA Monthly Assessment. If Payabli can’t find the item, select Add a One-Time Item or Add Item to Catalog.
Optionally, enter an invoice number to associate with the recurring charge.
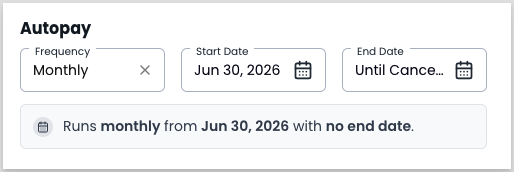
Set the schedule
Enter the start date, end date, and frequency. For example, a one-year HOA dues schedule might run from August 1, 2026 through July 31, 2027 on a monthly basis.
Create a balance-driven autopay
A balance-driven autopay charges the customer’s open balance at execution time. Payabli reads the balance on the scheduled date and charges whatever is owed. If the balance is zero, Payabli skips the cycle with no charge.
A customer can have only one active balance-driven autopay at a time. If one is already active, you can’t create another until the existing one is canceled.
To create a balance-driven autopay:
If you’re at the paypoint level, you can also create autopays from the Autopays report by clicking Create at the top of the screen.
Open the customer record
Navigate to Pay In > Customers, locate the customer record, and click the three-dot icon. Select Create autopay to open the Create Autopay modal.
Select the operation type
Choose Sale to capture funds immediately, or Authorize to hold the funds and capture manually.
Enter the amount and description
Enter the amount and search for or add a line item description. Optionally, enter an invoice number.
Related resources
See these related resources to help you get the most out of Payabli.