Create and send invoices (UI)
Create and send invoices (UI)
Create an invoice to bill a customer and collect payment online. Your customer pays through a payment link, with no manual transaction processing on your side.
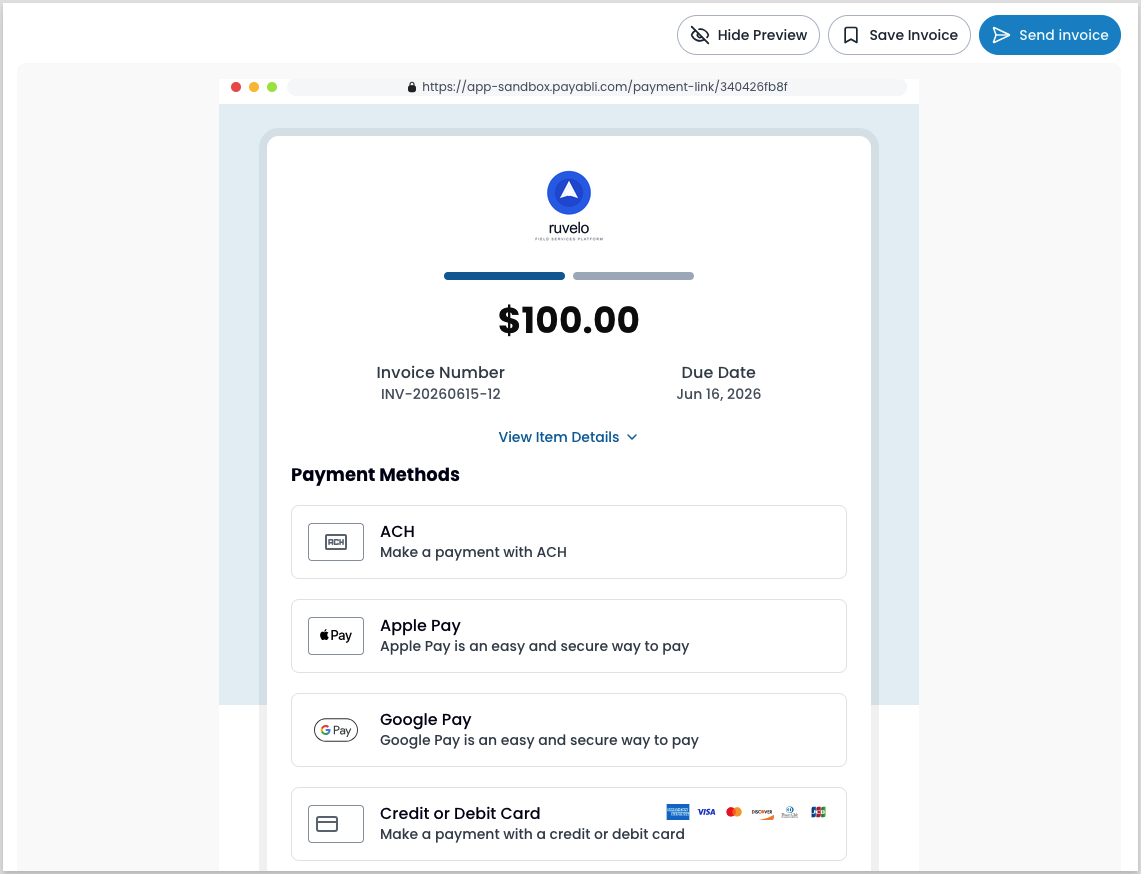
An invoice starts as a Draft you can edit. Payabli generates its payment link right away, even before you send it. You can deliver the link by email or SMS, or share it with your customer directly. When you send the invoice, it becomes Active, and your customer can pay using any available method.
Add an invoice
To add an invoice, start from the Invoices report:
Open the Add Invoice form
Navigate to Pay In > Invoices and select Add Invoice. As you fill out the form, a live preview updates. You can switch between formats: a payment link, email, or PDF version of the invoice.

Select the customer
Find an existing customer or add a new one. Adding a customer uses the same form as Manage customers.
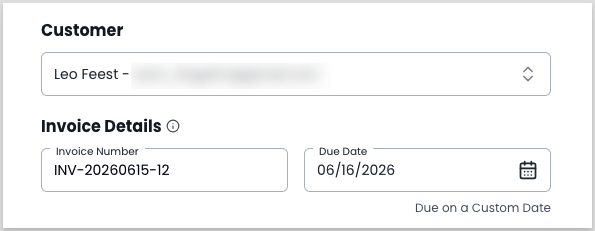
Enter invoice details
Assign an invoice number. Invoice numbers are alphanumeric, and Payabli prepopulates the field with INV-{date}-{number}.
Then set a due date: choose a specific date or a relative due date. For a relative due date, the start date is the invoice creation date. The due date also sets the invoice’s Payment Terms.
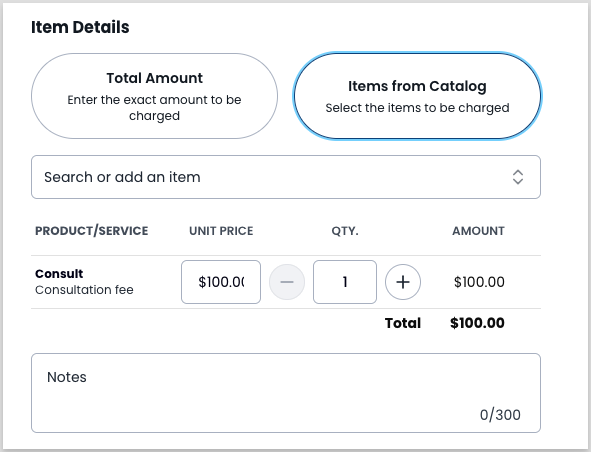
Add item details
Item details become active after you select a customer. Choose one:
- Enter a Total Amount — the exact amount to charge, plus any notes.
- Select items from your catalog. You can add items to the catalog with Add Item to Catalog, or add a custom, one-use item with Add a One Time Item.
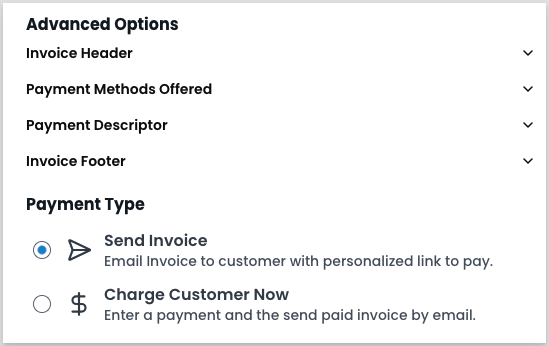
(Optional) Set advanced options
Under Advanced options, set:
- Invoice header — header text and a description.
- Payment methods — the methods available to the paypoint and customer.
- Payment descriptor — text shown on the customer’s bank statement when they pay.
- Invoice footer — footer text.
Choose how to collect payment
At the bottom of the form, under Payment Type, choose how to collect payment:
- Send invoice — Payabli sends the customer a personalized link to pay. The action button reads Send Invoice.
- Charge customer now — Fields to enter or select a payment method appear below the option, and the action button changes to Charge Customer. Payabli charges the customer right away and emails them a paid invoice.
Pay by SMS is an add-on feature — contact Payabli to enable it. When you send by SMS, Payabli prompts customers to opt in if they haven’t already.
Save, send, or charge
Finish the invoice:
- Save Invoice — saves the invoice as a draft and keeps your Payment Type selection. Send it later from the Invoices report.
- Send Invoice or Charge Customer — completes the Payment Type action you selected right away.
To send a draft later, or to resend an unpaid invoice, see Send or resend an invoice.
Related resources
See these related resources to help you get the most out of Payabli.
Next steps
- Manage invoices in the UI - After you create invoices, track and reconcile them from the Invoices report