

Manage paypoints
A paypoint is Payabli’s record of a merchant. Paypoints are created through Boarding and can’t be created or fully edited from this screen — underwriting governs most of the record. For how paypoints fit into Payabli’s entity hierarchy, see Entities overview.
This page covers the organization-level view. For how organization-level and paypoint-level access differ, see Access points.
Paypoints report
To open the Paypoints report, go to Portfolio > Paypoints. This screen lists every paypoint in your organization, so you can review paypoints and check their statuses in one place.
You can’t edit a paypoint’s core information from the report. Business details, banking information, and processing configuration are read-only here.
To act on an individual paypoint, click its three-dot (action) menu.
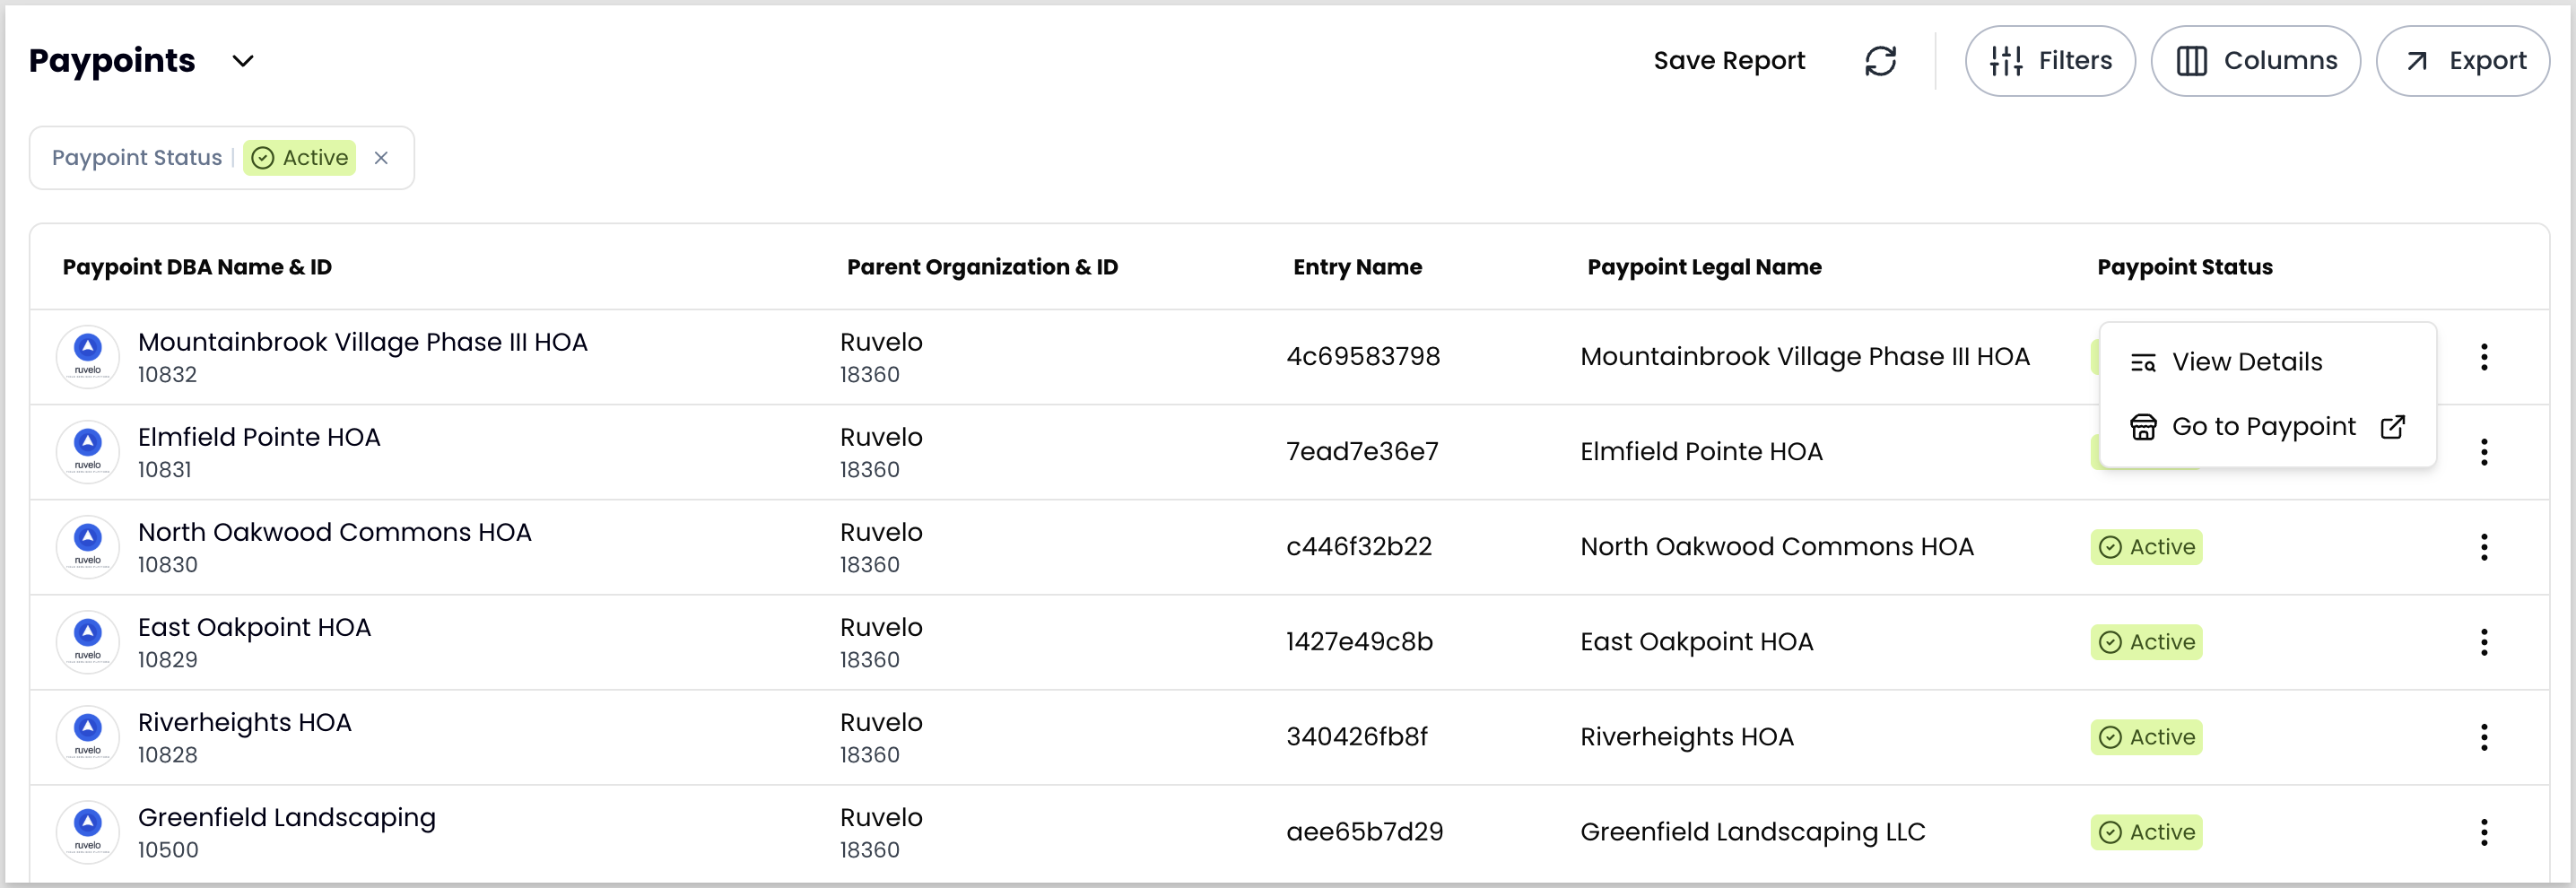
View a paypoint
To view a paypoint from the Payabli Portal, follow these steps:
- From the Paypoints screen, find the paypoint you want and click its three-dot icon.
- Select View Details to open the paypoint’s summary page.
From here, you can review the paypoint, open its reports, and act on them without changing your access point — you stay in the organization view. The summary covers both the paypoint’s Pay In and Pay Out activity, so you can see its dashboards and reports for each product it uses. Click Pay In or Pay Out to switch the context in this view.
To shift your access point into the paypoint instead, click Go to Paypoint.

Go to a paypoint
When you go to a paypoint, you shift your access point in the Payabli Portal. Your view is now scoped to that single paypoint instead of your whole organization. The role that applies is your assignment for that paypoint, which can differ from your organization-level role. See Access scope for how roles map to each scope.
The paypoint view shares many of the same features and reports as the organization view, but shows only that paypoint’s activity. Some actions are scoped automatically, too. When you create an invoice or add a vendor or customer, Payabli defaults to that paypoint for you.
To go to a paypoint from the Payabli Portal, follow these steps:
- Navigate to Portfolio > Paypoints.
- Find the paypoint you want and click its three-dot icon.
- Select Go to Paypoint.
Update a paypoint’s icon
Editing a paypoint is typically limited to admin roles, and even then admins can change only a narrow set of settings, because underwriting governs most of the record. Business details like the address and email address aren’t editable, since they’re tied to the merchant’s approved application.
To update the paypoint’s icon, follow these steps:
- Go to the paypoint you want to configure.
- Navigate to Settings > Paypoint Details.
- Click the pencil icon on Paypoint Information.
Related resources
See these related resources to help you get the most out of Payabli.
Prerequisites
- Entities overview - Understand how paypoints fit into the entity hierarchy and how organization- and paypoint-level access differ
References
- Paypoint statuses - Learn about the different statuses of paypoints