Manage users (UI)
Manage users (UI)
From Settings > User Management, you can invite users, adjust roles, and manage credentials. The list shows users for your current context: the organization or paypoint you’re viewing.
To see all actions available for an individual user, click the three-dot menu in their row. To view user details in a side panel, click their row. To find a specific user or group, click Filters to filter by created date, email, assigned role, and more.
Add a user
To invite users, you need the Manager or Admin role at the scope you’re working in. An organization-level role applies across all paypoints in that organization, but a paypoint-level role applies only to that paypoint. If you can’t add a user, check your role in your current context first. For details, see User roles overview.
Add to a single entity
By default, inviting a user adds them only to your current organization or paypoint. To add a user to a single entity:
- Navigate to Settings > User Management.
- Click Invite User.
- Enter the email address for the user you’d like to invite.
- Specify a user role with the dropdown in the Selected Entities list.
- Click Send Invitation.
The user will receive an email inviting them to create their account. This email includes a temporary password. During setup, they’ll need to fill in their user information, set a password, and configure multi-factor authentication (MFA).
Add to several entities
Use this flow when a user needs access to specific paypoints without organization-level permissions. For example, you can assign someone the Manager role at several paypoints while keeping their organization-level access with the Viewer role. This way the user can view trends and data across several paypoints while managing specific paypoints.
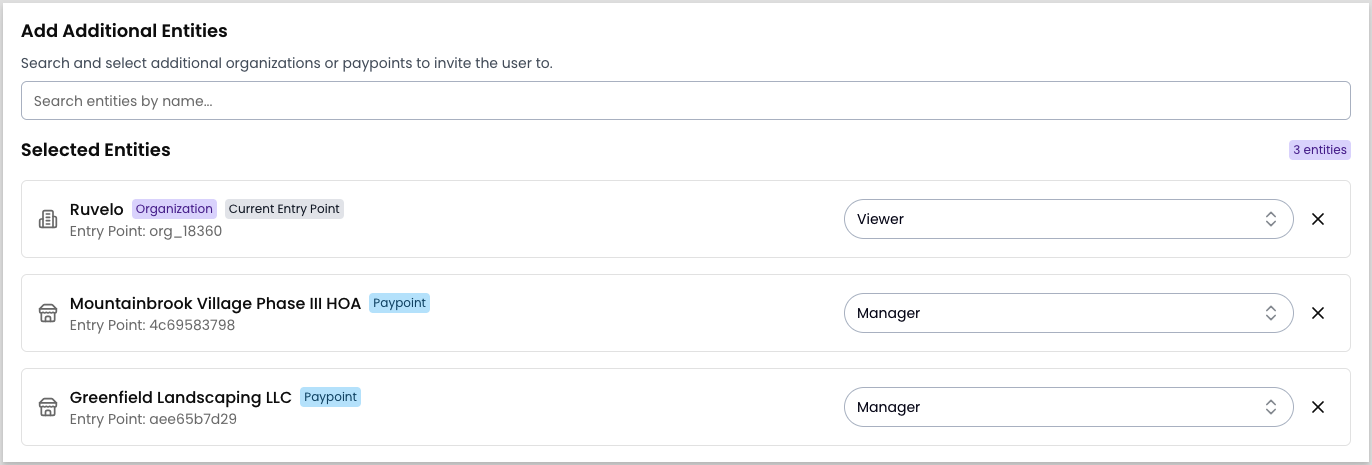
To assign a user across multiple paypoints in a single invitation, confirm you’re at the organization level using the context switcher. The Invite User form also indicates your current context with the Current Entry Point label.
- Navigate to Settings > User Management.
- Click Invite User.
- Enter the email address for the user you’d like to invite.
- Use the entity search to find and add each paypoint the user should access. Each one you add appears in the Selected Entities list.
- For each entity in the list, assign a role using the dropdown. You can assign different roles at different paypoints.
- Click Send Invitation.
The invitation email lists all entities the user has role assignments for.
Invite an existing user
Sometimes a user account exists in the system before the user sets up their account. For example, if the invitation email was lost before they could act on it, or if the account was created programmatically. In either case, you can send or resend the invitation without creating a new account.
From the user list:
- Navigate to Settings > User Management.
- Find the user who needs an invitation.
- Click the three-dot icon in their row.
- Select Resend Invitation.
From the user details panel:
- Navigate to Settings > User Management.
- Click on the user’s row.
- Select Resend Invitation from the panel.
Edit a user profile
To update a user’s profile or role assignments, navigate to Settings > User Management and click the user’s row to open the user panel.
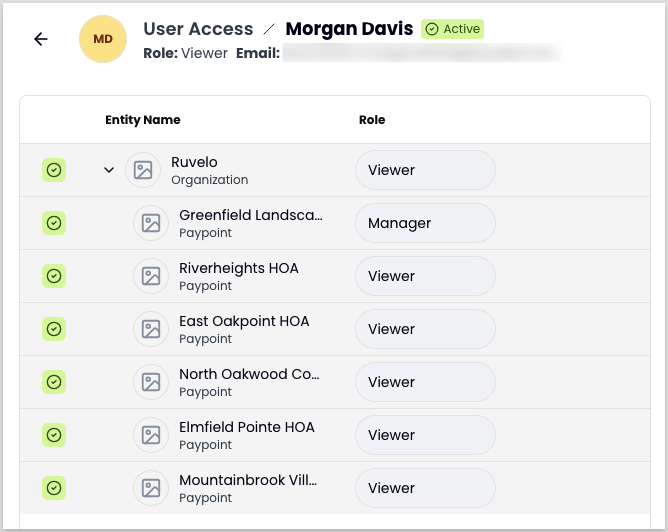
To review existing role assignments across all entities before making changes, click View User Access. Paypoints are grouped by organization.
To make changes, click the Edit User icon, update the name, email, role assignments, or other fields, and click Save. Only users with the Manager or Admin role can adjust user role assignments.
Manage credentials
Send a password reset
To send a password reset email to a user:
- Navigate to Settings > User Management.
- Find the user who needs a password reset.
- Click the three-dot icon in the user’s row.
- Select Send Reset Password.
- Click Send to confirm.
Reset MFA
A user may lose access to their MFA app and require a reset to regain access to the Payabli Portal. To reset a user’s MFA settings:
- Navigate to Settings > User Management.
- Find the user who needs an MFA reset.
- Click the three-dot icon in the user’s row.
- Select Reset MFA.
- Click Reset MFA to confirm.
You can also reset a user’s MFA settings from the user panel by clicking Reset MFA and confirming. This prompts the user to configure MFA on their next login.
Delete a user
To permanently remove a user from the Portal:
- Navigate to Settings > User Management.
- Find the user you want to delete.
- Click the three-dot icon in the user’s row.
- Select Delete User.
- Click Delete to confirm.