

Create vendors (Portal)
Vendors are the entities that offer goods or services to paypoints and organizations. They’re who gets paid in money out (Pay Out) transactions. Before you can use vendors in bills and payouts, you must add them. There are three ways to add vendors in the Payabli Portal: manually, by scanning an invoice, or with a bulk import.
Add a vendor manually
To add a single vendor by entering their details yourself, follow these steps:
- Navigate to Pay Out > Vendors and click Add Vendor.
- Click Enter Manually.
- Complete the fields in these categories:
- Account Information — the vendor’s identifying and contact details.
- Billing Details — the vendor’s primary billing address.
- Remit Details — where payments are sent, when different from the billing address. To copy the billing address into these fields, select Remit Details are the Same as Billing Details.
- Custom fields — any custom fields your organization has configured.
- Click Create Vendor.
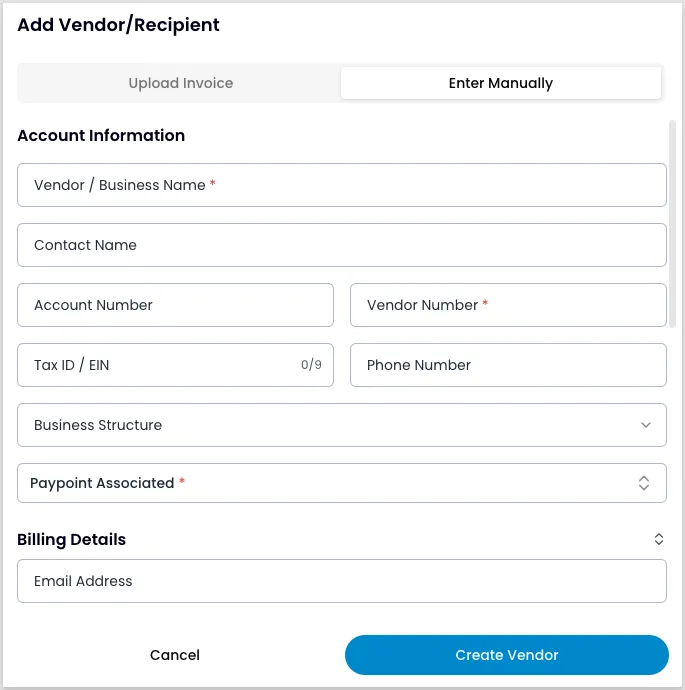
The manual form groups fields into the following categories. These fields are required: Vendor/Business Name, Vendor Number, Billing Address, City, Country, State, and ZIP Code.
Account Information
- Vendor/Business Name
- Contact Name
- Account Number
- Vendor Number
- Tax ID / EIN
- Phone Number
- Business Structure (dropdown)
Billing Details
- Email Address
- Billing Address
- Billing Address 2
- City
- Country
- State
- ZIP Code
Remit Details use the same fields as Billing Details and are optional. To reuse the billing address, select Remit Details are the Same as Billing Details.
For the validation rules Payabli applies to each field (allowed characters, address requirements, EIN and phone formats), see Field requirements and validation.
Add a vendor by scanning an invoice
If you have the vendor’s invoice as a file, Payabli can scan it and prefill the vendor’s details, reducing manual data entry.
- Navigate to Pay Out > Vendors and click Add Vendor.
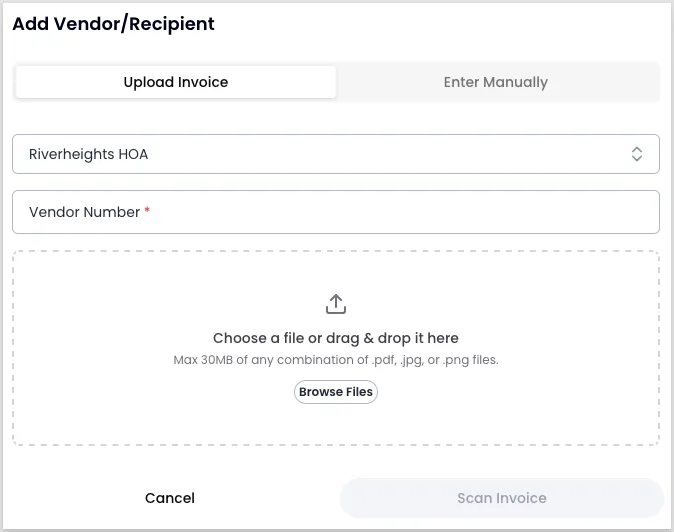
- Enter a Vendor Number. This is required before you can scan an invoice.
- Drag the invoice file into the upload box. You can upload
.pdf,.jpg, or.pngfiles, up to 30 MB in total size. - Click Scan Invoice. Payabli scans the file and attempts to fill in the vendor’s fields.
- Review the prefilled fields across the same categories as manual entry — Account Information, Billing Details, Remit Details, and any custom fields — and correct anything the scan missed or got wrong.
- Click Create Vendor.
Import a vendor list
To add many vendors at once, import them from a CSV file. This is useful if you already have a vendor list to bring into Payabli.
Before uploading, download the sample file and use it as a reference for the correct format and column order. For field definitions and valid values, see Field requirements and validation in the API guide.
To upload your vendor list:
- Navigate to Pay Out > Vendors and click Import.
- In the Import Data modal, upload your CSV file by clicking the upload area or dragging the file into it. The file must be a single
.csvunder 2 MB. You can also download a sample file from this modal by clicking Download Sample Files (*.csv). - Click Accept.
The import inserts each row as a new vendor record and returns error messages if it encounters an error preventing it from creating new vendor records.
Related resources
See these related resources to help you get the most out of Payabli.
Next steps
- Manage vendors (Portal) - Once a vendor exists, manage its record and payment methods from here