

Merchant access overview
Your paypoint is your access point to Payabli: a payment portal scoped to your business. Your day-to-day work splits into two tracks: Pay In for money coming in from customers, and Pay Out for money going out to vendors. You set up the records behind each (customers and invoices, vendors and bills), collect or send payments against them, and report on all of it from the same place. Pay Ops rounds this out with paypoint-level administration, like managing other users.
What you see when you log in
Your dashboard shows your paypoint’s activity: transaction volume, counts, and recent activity for your business.
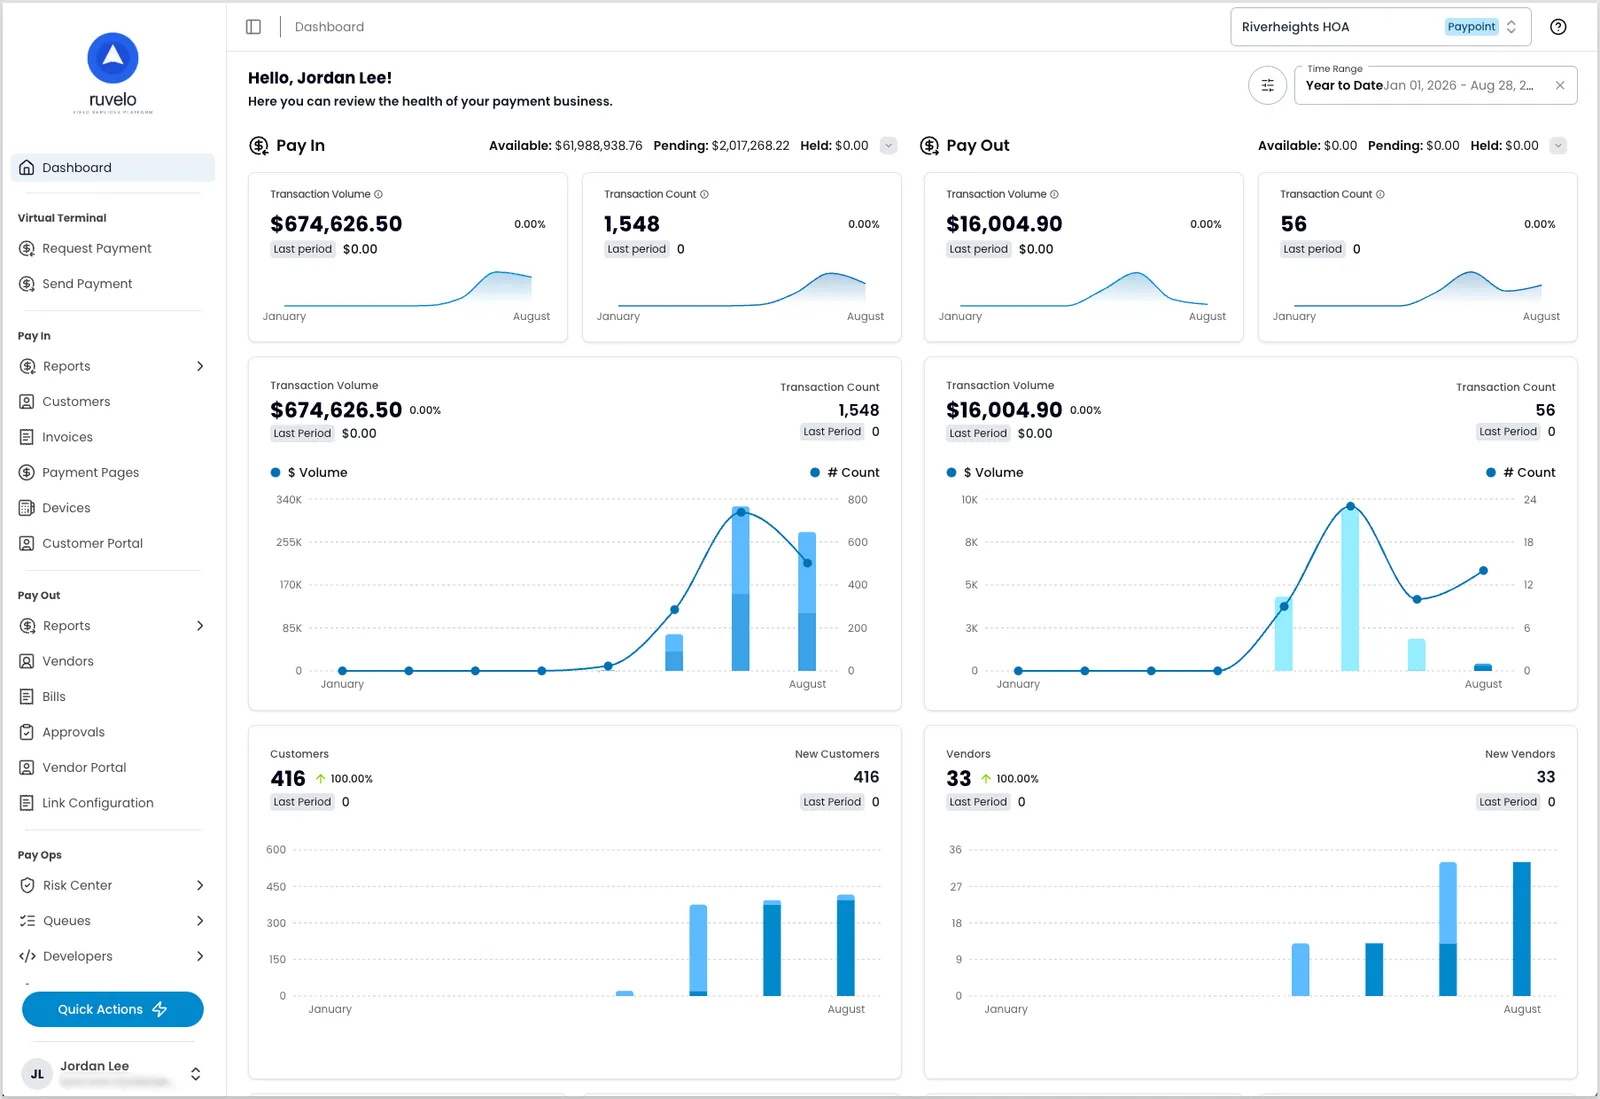
The sidebar splits into Pay In, Pay Out, and Pay Ops. Every report, record, and quick action you see scopes to your business, and anything you create — a customer, an invoice — defaults to your paypoint. See Navigate the Payabli Portal for a walkthrough of the sidebar, search, and quick actions.
Customers, vendors, invoices, and bills
Pay In starts with your customers and what they owe you:
- See Manage customers to track who owes you and their payment history.
- See Create and send invoices to bill a customer for what they owe you.
Pay Out starts with your vendors and what you owe them:
- See Manage vendors to track who you owe and their payment details.
- See Create a bill to record what you owe a vendor before you pay it.
You’ll reference these records throughout the portal — the Virtual Terminal, reports, and disputes all tie back to a customer, vendor, invoice, or bill.
Virtual Terminal
The Virtual Terminal is your tool for collecting or sending payments directly, with or without an invoice, in one flow. See Create a transaction (UI) for the full walkthrough.
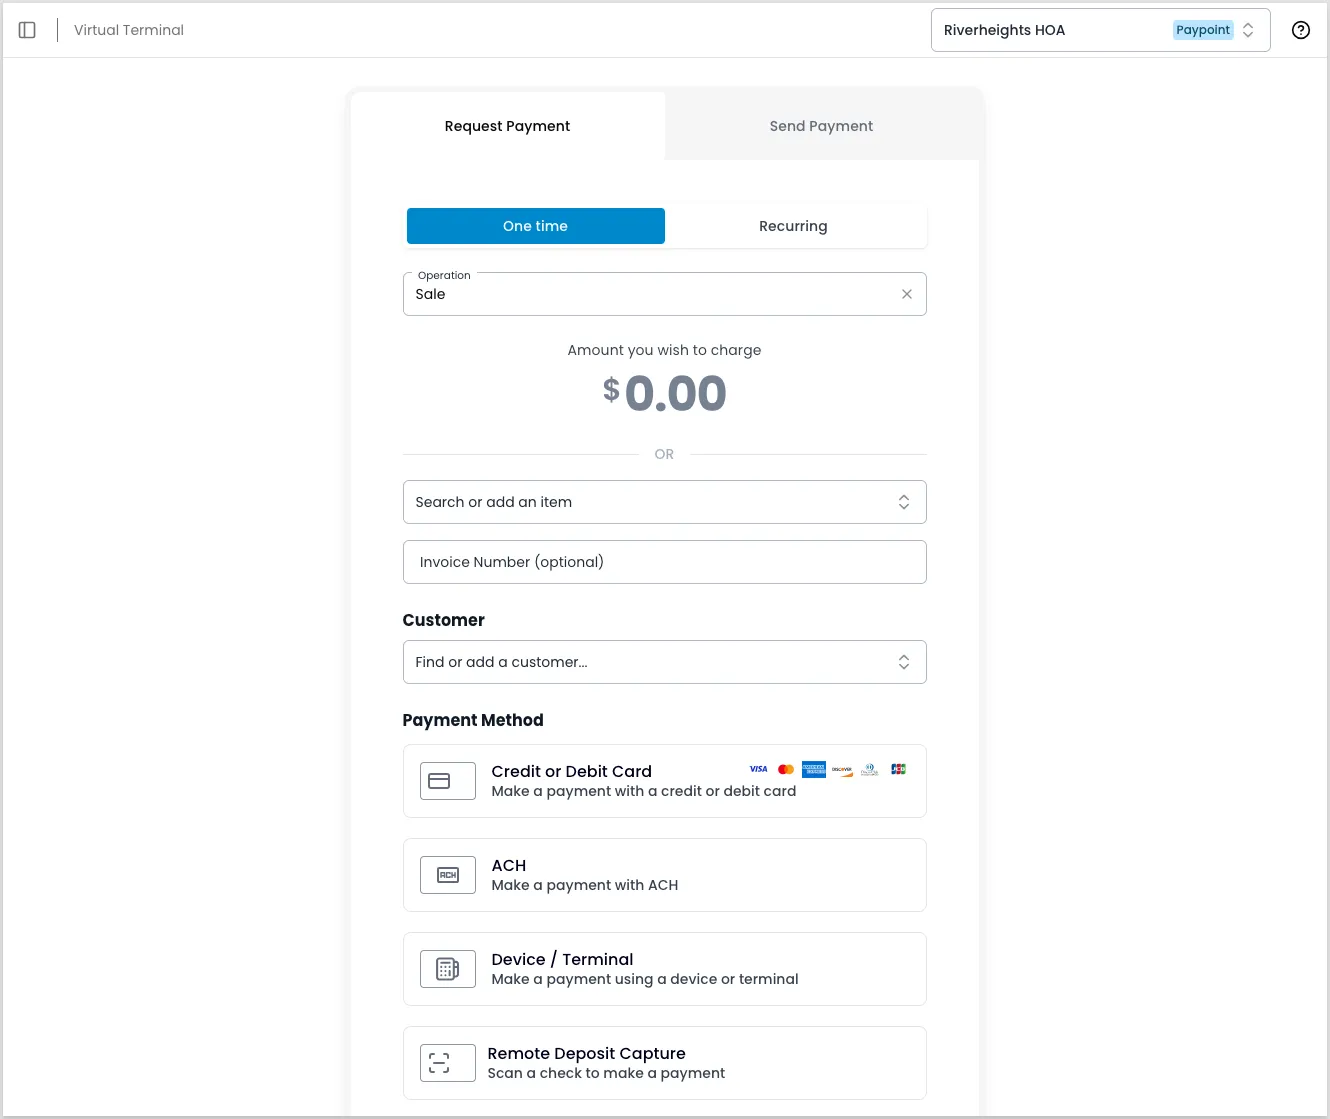
Beyond one-time charges, you can set up an autopay for a customer’s recurring charges, or pay a vendor directly instead of creating a bill first — see how a bill reaches a payout for how that fits into the payout process.
Reports and disputes
Most of your data lives in reports — filterable tables you can search, filter, and export, with each row opening into the full record. See Manage Pay In transactions and Manage Pay Out transactions for a tour of the reporting interface, including customizing columns, filtering, and exporting. You can also build your own with custom reports, or schedule one to run and deliver automatically with automated reports.
Disputes and returns need your response as they come in. See Find and review card disputes and Manage ACH returns for how to respond and what evidence to submit.
Roles and administration
Roles at your paypoint follow a four-tier hierarchy: Viewer, Member, Manager, and Admin, each including the permissions of the tier below it. See Roles and permissions for what each role can do, and Manage your profile to check your own.
If you’re an Admin or Manager, you can invite and manage other users at your paypoint — see Manage users. Admins can also configure notifications for payment, payout, and boarding events.
Related resources
See these related resources to help you get the most out of Payabli.
Prerequisites
- Create your Payabli user account - Create your user account before you can log in to your paypoint