

Manage webhooks (Portal)
Manage webhooks (Portal)
A webhook sends event data to an endpoint you control, so your system can react to Payabli events without polling for them. Use the Webhooks screen to add a webhook, change which events it sends, and trace what a given event delivered.
For the events you can subscribe to and their payloads, see Notifications overview. To build and test a receiving endpoint, see Webhook developer quickstart. To send email or SMS alerts instead, see Manage notifications (Portal).
Add a webhook
A webhook needs an endpoint URL and at least one event. Headers and a credential are optional, and you can change any of it later.
Enter the webhook details
Set WebhookURL to the endpoint that receives the events, choose the scheme from the dropdown, add a Description, and select the time zone.
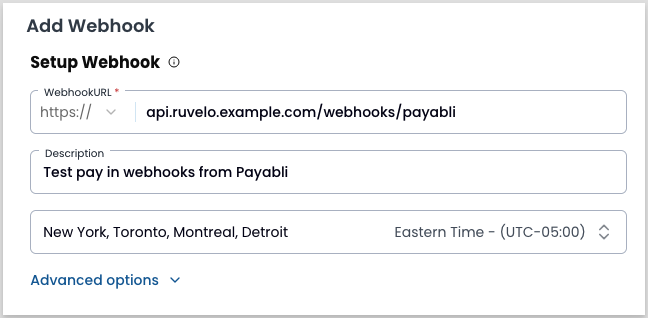
The description does more than name the webhook. It appears under the webhook name on the details screen and as a column in the notification logs. That’s how you tell which webhook a delivery came from.
Set advanced options
Expand Advanced options if you need custom headers or a credential.
- Header Setup adds headers sent with each request. Enter a Header Key and Header Value, then click Add Header for another pair.
- Webhook Credential attaches a stored credential. Select one from the list. Credentials come from Pay Ops > Developers > API Credentials and not every organization or account has this feature.
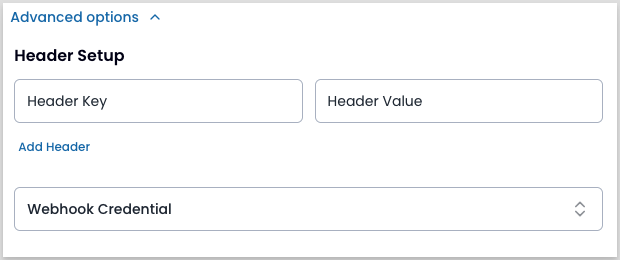
Custom headers are the usual place to put an authentication token your endpoint expects.
Header values appear in plain text on the webhook details screen and in delivery payloads. Treat anything you enter here as visible to anyone who can read those screens.
Select the events to send
The picker groups events by area, then by object. Expand an object to select events individually, select an object to take all of its events, or click Select all Pay In Events to take the whole area. Expand All opens every object at once.
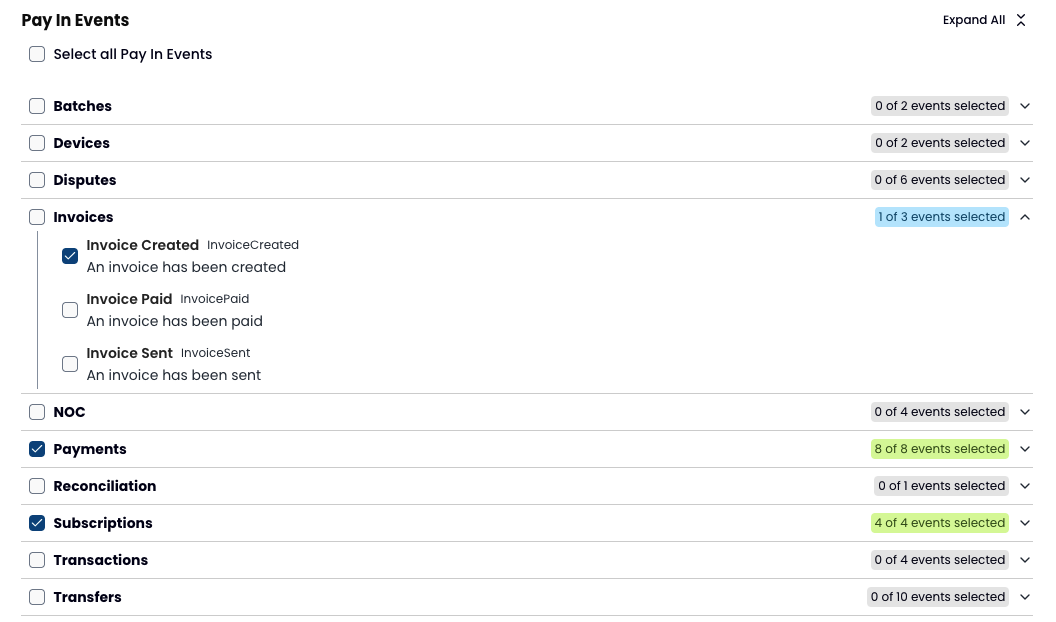
Each event shows its display name next to the event name the API uses, such as Invoice Created and InvoiceCreated. Use the API name to find that event’s payload in Notifications overview. Each object also tracks how many of its events you’ve selected, so you can confirm your selection without expanding everything.
To leave without creating the webhook, click Back.
Manage existing webhooks
Navigate to Pay Ops > Developers > Webhooks. After a webhook exists, view, edit, or delete it from its row in the list.
View webhook details
Find the webhook in the list, click its three-dot icon, then click View Details. The detail view shows the URL, description, and time zone, along with the events the webhook sends.
Each event row lists its event type and ID, which makes this a fast way to check which events a webhook sends when notifications aren’t arriving as expected. That ID identifies the event subscription on this webhook, not a delivery. Notification Logs also has an Event ID column, but it identifies a delivery and takes a different form, so the two never match.
To see what Payabli sends for one of those events, click the three-dot icon on its row, then click View Logs.
View Logs doesn’t show delivery history. It shows configuration. You’ll see the headers this webhook sends and the shape of the request body, with placeholder types in place of real values. To see actual deliveries, their status, and their payloads, see Review notification logs (Portal).
The panel labels the request body as a static example.
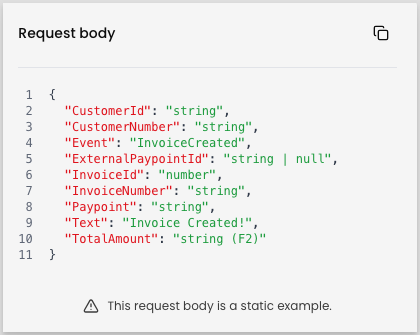
The headers shown here include the values of any custom headers on the webhook, in plain text.
Edit a webhook
- Find the webhook in the list, click its three-dot icon, then click Edit Webhook.
- Change any of the webhook fields, or add and remove events.
- Click Review.
- Review your changes, then click Add Webhook to save them.
Editing reuses the same form and review step as adding, so the button that saves your changes reads Add Webhook.
To leave without saving your changes, click Back.
Delete a webhook
Deleting a webhook stops every event it sends and you can’t undo it. Payabli doesn’t deliver events to that endpoint again until you add a new webhook for it.
- Find the webhook in the list, click its three-dot icon, then click Delete Webhook.
- In the confirmation modal, click Delete to confirm.
Related resources
See these related resources to help you get the most out of Payabli.
Prerequisites
- Notifications and reports overview - Know which events exist before you subscribe a webhook to them